This Mod is very beneficial for any z31..albeit Naturally Asperated or Turbocharged.
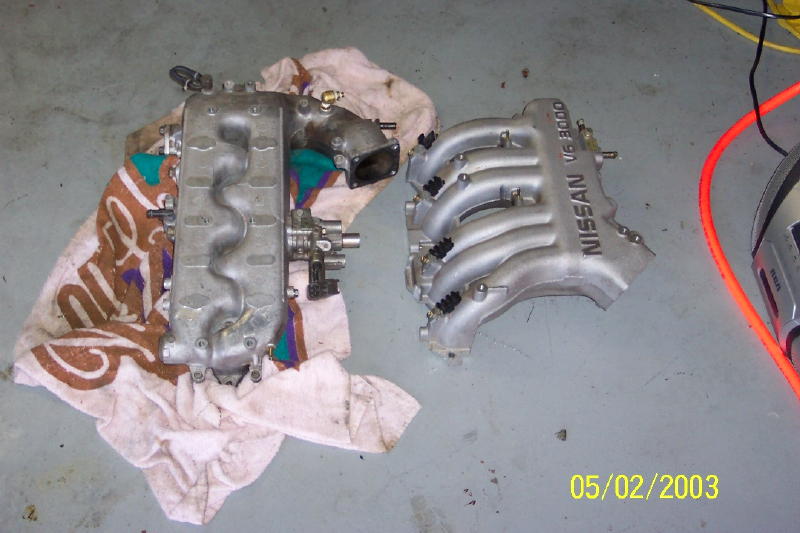
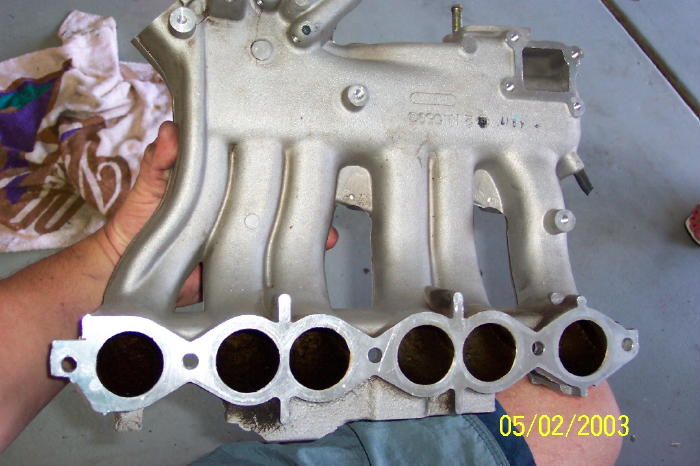
The upper portion of the Pathfinder(pathy) intake manifold has superior flow over the factory z31 unit. Just by comparing the 2 you can see the pathy has long straight runners that lead to a log style plenum to where the throttle body attatches directly to the plenum. Compare this to the stock z31 unit and the runners are short and when the manifold is split open you can see that there is much to cause turbulence before the air reaches the valve, also the throttle body is attached to the plenum by a sweeping, cast in, extension that routes around the backside of the plenum above the hot exhaust crossover pipe.
You can see the obvious advantages of switching just by looking at the 2.
First, to get started, you need a semi-complete parts list. Here is a rundown of the basic parts you will "need" to make the istall complete. any gaskets required are your responsibility
1. 1993 Pathfinder Manifold or similar
2. 1993 Pathfinder distributor hold down bracket or similar(the one on the left)
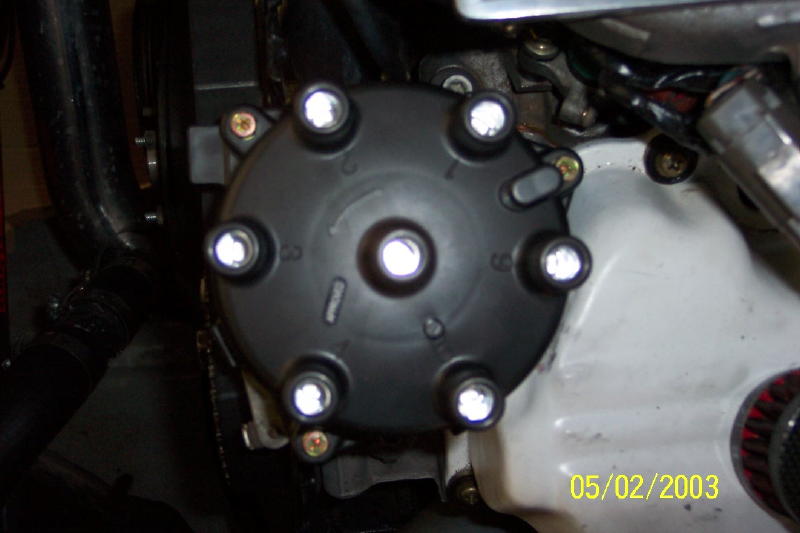
3. 1993 Pathfinder distribtor or similar with cap and rotor or similar
4. 1993 Pathfinder spark plug wires or similar
5. alot of 1/4" washers(you'll see)
Okay, Now the fun stuff.
1. set engine at TDC for compression on #1 cylinder.
2. remove the negative terminal from the battery.
3. remove any of the intake pipes that lead to the throttle body.
4. disconnect throttle cables, any thing that is bolted or clipped to the manifold excluding EGR and FICD and cold start valve. these items will be removed with the plenum.
5. disconnect spark plug wires and remove.
6. remove the distributor, and again, making sure engine is at TDC for #1 cyl.
7. remove throttle body from plenum.
8. remove plenum and cover intake passages with suitable cloth or caps.
now that the old unit is out, now would be a good time to replace the spark plugs if needed.
For installation..
1. Depending on what style fuel rails you have, the pathy manifold will have to be shaped to allow fitment into this area, a dremil tool would be handy here. NOTE, it is quite possible you might not have any clearance problems here, check this first before any modifications are made.
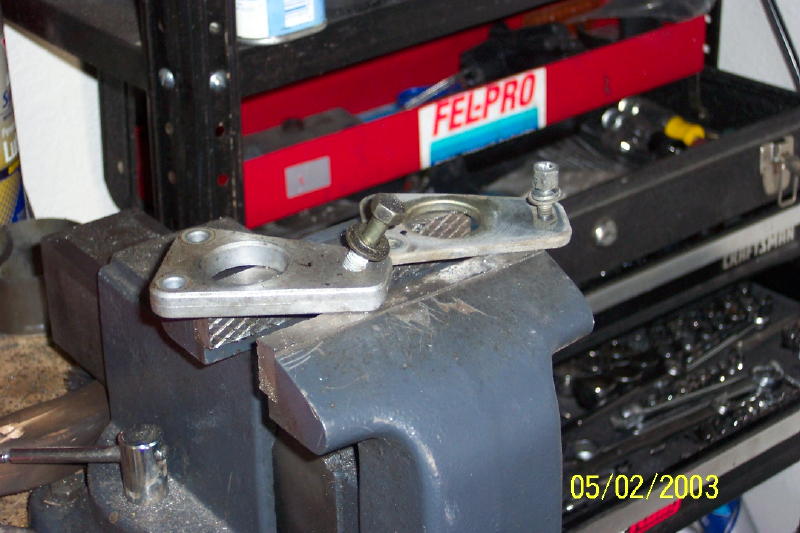
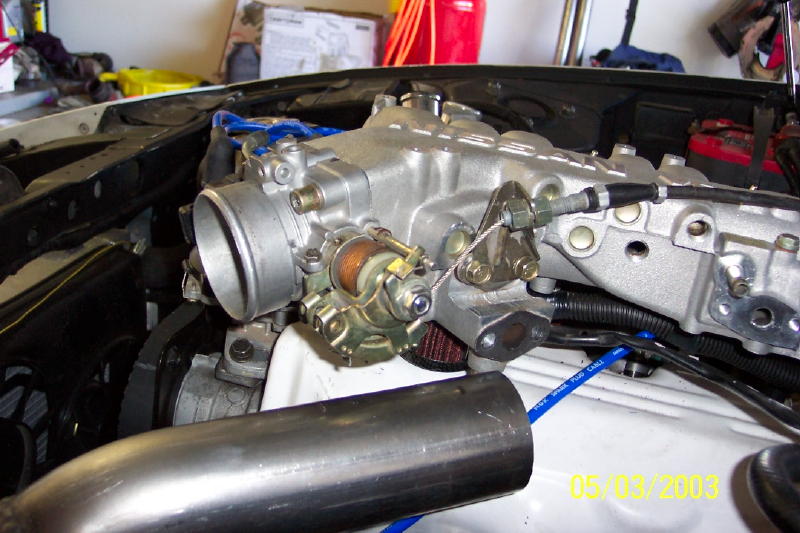
2. The pathy manifold has alot of hoses and valves and what-not attached to it to provide EGR and cold start idle control valve, I ditched this stuff and kept only the AACV for normal idle control. Notice the block off plates...

3. Also, To install the pathy distributor, you need to modify the z31 valve covers. The pathy valve covers have an indentation to allow clearance for the larger distributor. simply take the round end of a ball-peen hammer and duplicate this indentation to allow room for the distributor to be mounted securely.
4. Notice the position of the #1 spark plug location on the new distributor, it is not the same for the z31 style distributor. there is no need for concern, just align rotor to point to the #1 plug location. best description is that it points to the pass door hinge.
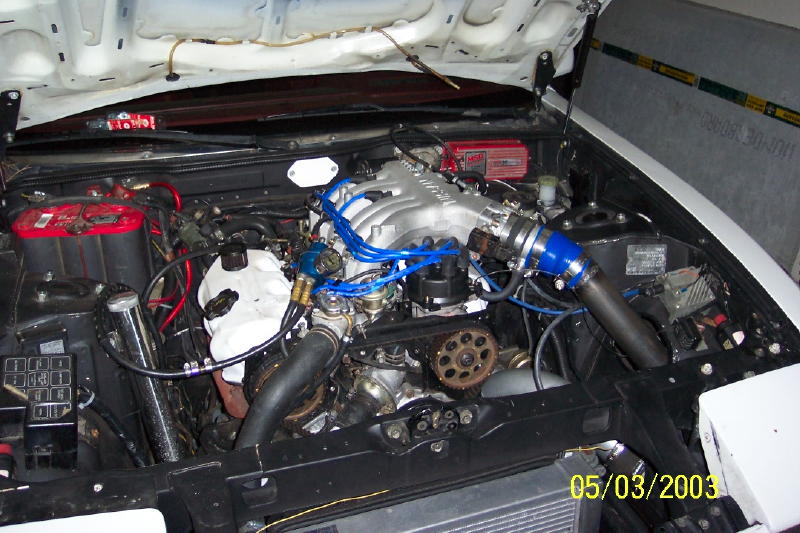
5. Bolt entire assembly down and check for clearance and rubbing on factory components.
6. Pathy idle control valve uses a different style connector than the z31, you can find the correct plug at the junk yard or dealer, but I just removed the pins from the factory plug and attached them directly to the open male plug contacts on the valve itself. you can do this however you like. something that is not on the pathy manifold it a valve for fast idle(for A/C or similar) just make sure when you get the car running you provide enough rpms for that stuff to operate(my vehicle doesn't have any of the sort so I was able to leave this as is)
7. Bolting the TB to the plenum, I used a 60mm 240sx unit that required some port matching, other than that it is BOLT ON. you can use the factory TB or use the 240sx unit. if you decide on the 240sx unit(if it has cruise control) the linkage will not clear the distributor cap, you will have to mount this inverted(see pic).
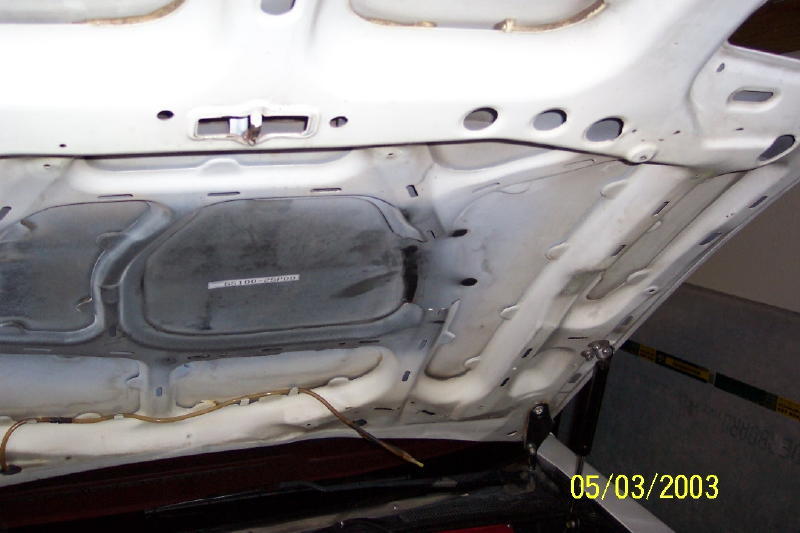
Now that eveything is bolted down and secure you will need to focus your attention to the hood.
"WARNING" do not shut the hood, it will leave a nice large dent for you(don't ask)
Now for hood clearance you can do whatever you like...but here is what I did.
1. Open Hood and remove rear bolts that attach the hinge to the hood.
2. unscrew the front bolts for the hinge but make sure you do not remove them.
3. Now tilt the hood forward and using some longer bolts, add enough washers to lift the rear of the hood by 1". install a few washers to the front bolts(just to take up slack as to not bend the hinge while torquing it down.
4. The front hood latch will not allow the hood to close now, so undo the adjusting bolts and raise the latch all the way up(or so the hood sits flush on the bumper).
easier ways to do this include...
Hood Scoupe, Cowl Induction Hood, or just cut a hole in the hood and have it peak out while driving
This is a Basic rundown of wha you will need to tackle to complete this Mod. There were quite a few things left out, but you should be able to figure out what else you need if it is not listed here.
Obviously Engloids Plenum will be easier, but this is what I had to work with.
Good luck and enjoy!
